


This post may contain affiliate links. Please read our disclosure and privacy policy for more information.
Buying a used car can save money, but hidden crash damage can turn a good deal into a long-term headache. Some repairs look fine on the outside but cause problems later, like uneven tire wear, wind noise, water leaks, or strange handling. A careful accident check helps you understand what you are really buying.
What the concept is
Checking if a used car has been in an accident means looking for signs of past collision damage and repair work. This includes paperwork checks, a detailed walk-around, and a close look at body panels, paint, glass, lights, and the structure under the car.
Not every accident is a dealbreaker. A small bumper repair is very different from major frame damage. The goal is to spot the difference before you agree to buy.
Why people do it
People check for accident history to avoid cars with hidden problems. Past crashes can lead to:
- Poor alignment that never feels right
- Rapid tire wear
- Airbag or sensor issues
- Rust starting under fresh paint
- Water leaks from damaged seals
- Lower resale value later
A crash check also helps with fair negotiation. If you find proof of repainting or replaced panels, you can ask questions and decide if the price matches the car’s real condition.
Things to know before starting
You can do a lot yourself with simple tools and good lighting. Try to view the car when it is clean and dry, and inspect it in daylight. Rain and darkness hide paint and body flaws.
Bring a few basic items:
- A small flashlight
- A thin magnet (optional)
- A paper towel or rag
- Your phone camera for close-up photos
Also plan for a test drive on different roads. Handling and noise clues often show up only when driving.
If the seller refuses a careful inspection or rushes the process, treat that as a warning sign.
Step-by-step explanation
1) Start with documents and questions
Ask direct questions first. After a question, pause and let the seller answer fully.
- Has the car ever been in a crash or had body work?
- Which parts were repaired or replaced?
- Were airbags deployed?
- Do they have repair receipts or photos?
Look at service records for hints like “body shop,” “paint,” “radiator support,” “headlamp,” or “supplement.” Receipts matter because they show what was actually done.
2) Walk around the car and check panel gaps
Stand back and look down both sides of the car. Panel gaps should be even. Check:
- Hood-to-fender gaps
- Door-to-door alignment
- Trunk-to-quarter panel gaps
- Bumper-to-fender fit
Uneven gaps, panels that sit higher or lower, or a bumper that looks slightly “pulled” can point to past impact.
3) Look for paint mismatch and overspray
Paint work is common after accidents. Some repaint jobs are good, but you still want to know it happened. Compare paint color and texture between panels, especially:
- Front fenders and hood
- Rear quarter panels and trunk
- Doors next to each other
Use your flashlight at an angle. Watch for different orange-peel texture, a cloudy clear coat, or tiny dust specks trapped in paint.
Check for overspray on rubber seals, wheel well liners, and inside door jambs. Factory paint lines are usually clean and consistent.
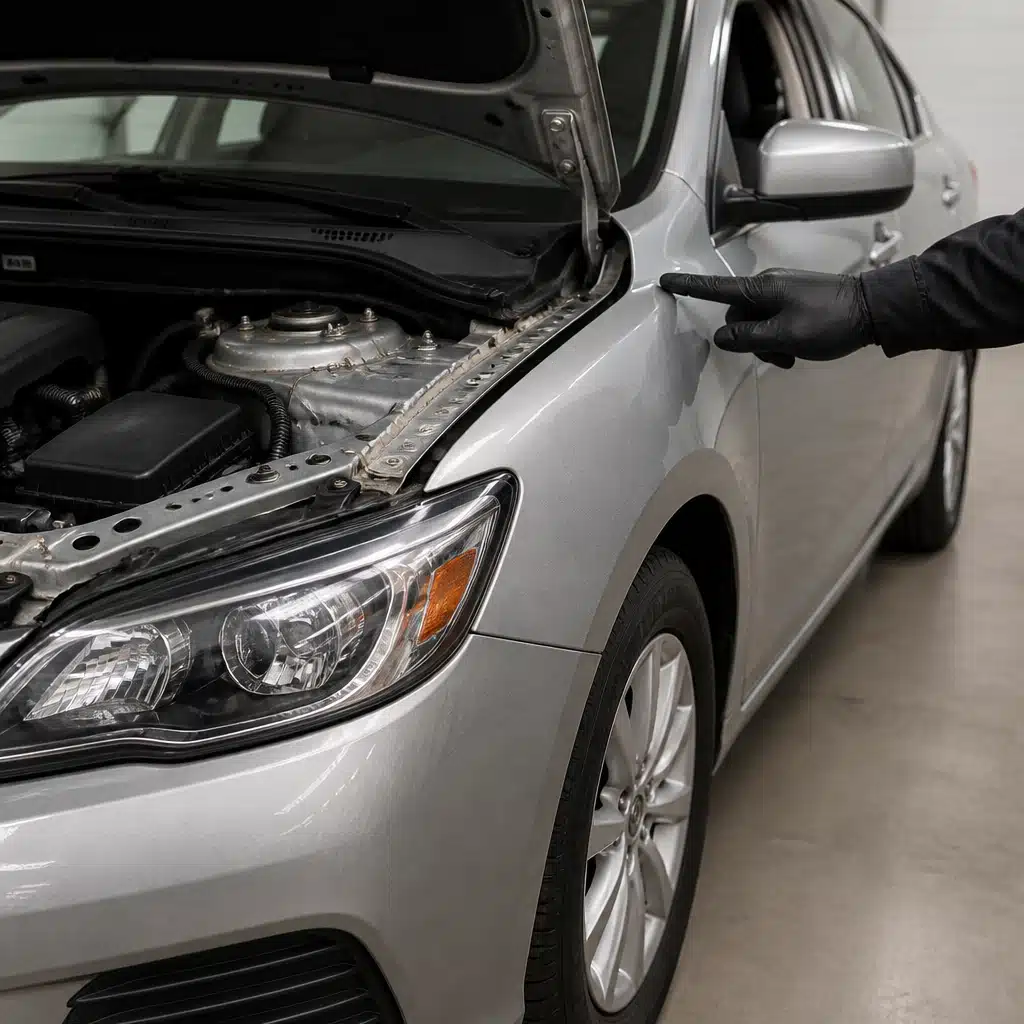
4) Check bolts, seams, and stickers in the engine bay
Open the hood and look at the hardware. Factory bolts often have consistent paint marks and no tool scratches. Clues to repair include:
- Scratched or shiny bolt heads on fenders and hood hinges
- Wrinkled inner fender metal
- Uneven seam sealer that looks hand-applied
- Missing or damaged VIN or information stickers
Also look at the radiator support area and headlight mounts. Front-end accidents often show up there.
5) Inspect the trunk area and spare tire well
Rear hits are easy to hide with a good bumper cover. Lift the trunk floor and check the spare tire well for:
- Ripples in the metal
- Fresh undercoating or thick paint in one area
- Water stains or dampness
- Repair welds that look different from factory spots
Look behind trunk trim panels if possible. A flashlight helps.
6) Check glass, lights, and dates
Look for cracks, chips, or foggy headlights, but also check consistency. Many windows have small markings with a manufacturer logo and date code. A single window that looks newer than the rest can mean replacement.
That does not always mean an accident, but it is a reason to ask what happened.
7) Look underneath for bent parts and fresh coatings
Turn the front wheels to see inside the wheel wells. Check the lower parts with a flashlight. Watch for:
- Bent suspension arms or steering components
- Fresh undercoating that ends in a sharp line
- New bolts on one side only
- Scrapes on the subframe or pinch welds
If the steering feels odd during the drive, that can also point to damage or poor repairs. If you notice stiffness or strange steering feel, compare symptoms with hard steering causes and fixes to separate crash issues from normal wear.
8) Do a careful test drive
Drive on a smooth road, then a rougher road, and then at highway speed if possible. Watch for:
- Car pulling left or right on a flat road
- Steering wheel off-center when driving straight
- Vibration during acceleration or braking
- Wind noise from one door area
- Rattles that sound like loose trim
Try a few moderate braking stops in a safe area. If braking feels uneven or the car darts, suspension or structural issues are possible. For general brake hardware basics, the Pads vs rotors comparison can help you understand what parts could be involved.
9) Scan for warning lights and hidden problems
Turn the key on and watch the dash. Airbag and ABS lights should come on briefly and then turn off. A light that stays on needs an explanation.
If the check engine light is on, do not ignore it. Some sellers clear codes right before a sale. A basic code scan can reveal recent resets and stored issues. If you want to understand common causes, use check engine light explained as a simple reference for what codes often mean.
10) Get a professional inspection for any doubts
If you see multiple signs of repair, pay for a pre-purchase inspection at a trusted shop or body shop. Professionals can measure structural points, check paint depth, and spot repair work you may miss. This step matters most for newer cars, high-value cars, or any car that feels “off” on the road.
Common mistakes to avoid
- Only looking at the exterior: Serious clues are often under the hood and under the trunk floor.
- Skipping the test drive: Alignment, noise, and vibration clues show up when moving.
- Assuming “clean” paint means no crash: A detailed repaint can hide damage.
- Trusting a single good sign: One straight panel does not rule out repairs elsewhere.
- Ignoring warning lights: Electrical and airbag issues can follow a crash.
Safety and legal considerations
Airbags, seat belts, and crash sensors are safety systems. If you suspect prior airbag deployment, confirm the repairs were done correctly. Missing airbag labels, a replaced steering wheel, or mismatched interior panels can be clues.
Title and damage disclosure rules vary by location. Some areas require sellers to disclose known major damage, but private sales can still be risky. If paperwork shows salvage, rebuilt, or flood branding, get expert help before buying.
For any car that feels unsafe to drive during the test drive, stop and walk away. Use Safe to Keep Driving as a practical reference for when a vehicle should not be driven.
Final practical advice
Use a simple rule: One small clue is a question, but several clues form a pattern. If you find uneven panel gaps plus paint mismatch plus new bolts in the engine bay, treat it as past collision repair until proven otherwise.
Take photos of anything that looks odd and ask for receipts. If answers feel vague or the seller avoids details, move on. There are many used cars out there, and time spent checking accident signs is time saved from surprise repairs later.


