




This post may contain affiliate links. Please read our disclosure and privacy policy for more information.
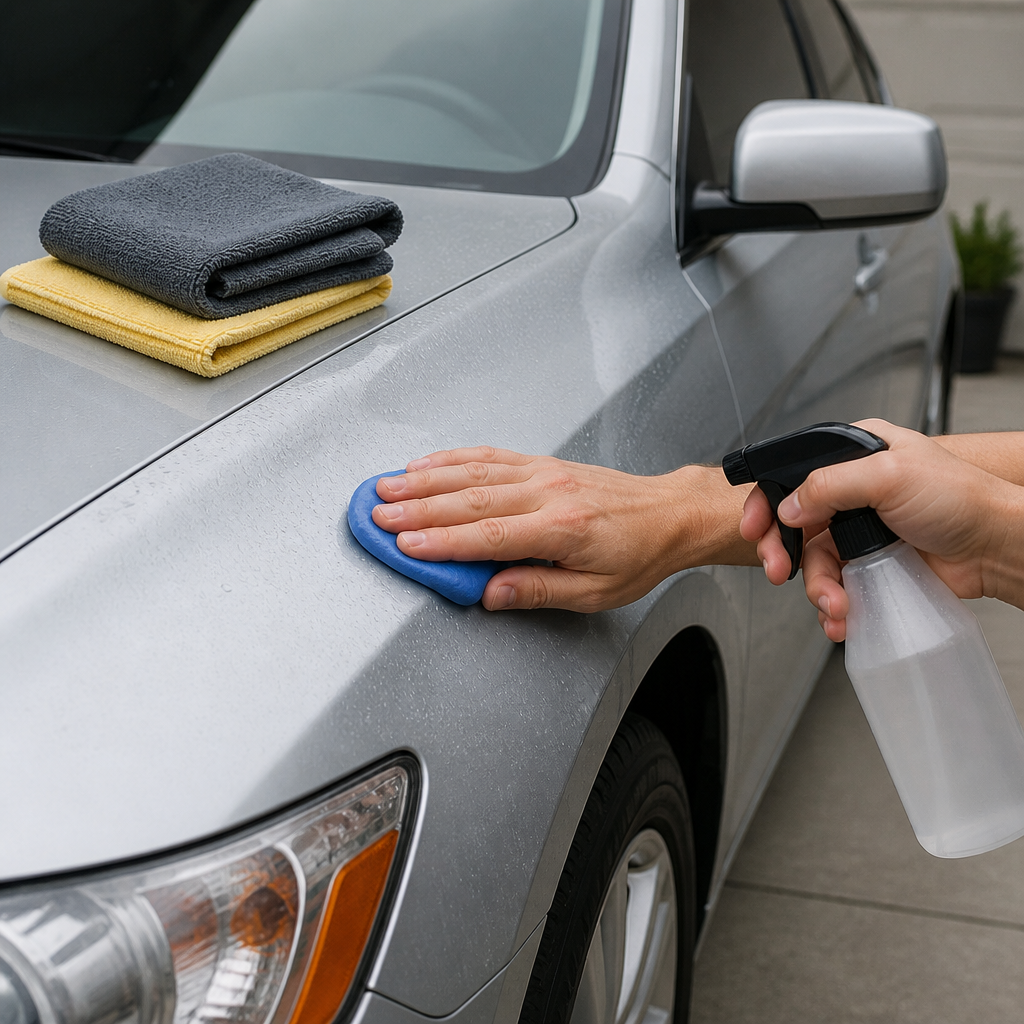
A clay bar treatment is one of the easiest ways to make your paint feel smooth again. It removes tiny bonded dirt that normal washing leaves behind. After claying, your car often looks glossier, and wax or sealant sticks better.
The good news: You can do it at home with simple tools. If you take your time and use enough lubricant, it is safe for beginners.
Tools and Items Needed
- Car wash soap and a bucket
- Wash mitt or sponge
- Microfiber drying towels
- Clay bar kit (clay + lubricant) or clay mitt
- Extra clay lubricant or quick detail spray
- 2 to 4 clean microfiber towels for wipe-off
- Nitrile gloves (optional, but nice to have)
- Plastic sandwich bag (for the “bag test”)
- Painter’s tape (optional, for sensitive trim)
- Wax, sealant, or spray ceramic (recommended after claying)
Safety or Legal Notes
Work in the shade on cool paint. Hot panels make the lubricant dry too fast, which can lead to scratches. Do not clay in direct sun.
Clay bars can cause light marring. This is normal, especially on soft dark paint. If you want a perfect finish, you may need polishing after. If you do not have a polisher, you can still clay and then protect the paint. Just use gentle pressure and lots of lubricant.
Never use a clay bar on matte or satin paint unless the product clearly says it is safe. Claying can change the look of matte finishes.
Numbered Installation Steps
1. Wash the car first
Claying is not a replacement for washing. If you clay a dirty car, you drag grit across the paint.
- Rinse the car well.
- Wash from top to bottom.
- Rinse again.
- Dry the car with microfiber towels.
2. Do a quick “bag test” to find rough spots
Put your hand inside a clean plastic sandwich bag. Lightly glide your fingers over the paint.
If the paint feels like tiny bumps or sandpaper, those areas need claying. Common spots: Hood, roof, trunk, and the area behind the wheels.
3. Prepare the clay
If you are using a clay bar: Tear off a small piece, about the size of two fingers. Knead it into a flat disc. Keep the rest sealed in the wrapper.
If you are using a clay mitt: Rinse it clean and keep it wet. A mitt is faster, but a bar can feel more precise.
4. Pick one small section at a time
Work in sections around 2 ft x 2 ft. This helps you control the lubricant and check your results.
Start with the hood or roof, not the lower rocker panels. Lower panels hold more grime.
5. Spray plenty of lubricant
Soak the section with clay lubricant. Do not be shy. The clay should glide, not grab.
If you run out of included lubricant, a dedicated clay lube or quick detail spray works best. Do not use glass cleaner or harsh degreasers.
6. Glide the clay with light pressure
Move the clay in straight lines. Go left to right, then up and down. Do not use circles. Keep your hand flat. Use very light pressure, like wiping dust off a table.
At first you may feel resistance. After a few passes, it should feel smoother. That is the contamination being removed.
7. Keep checking the clay and fold often
After each small section, look at the clay. You will see dirt on it. Fold and knead it so a clean surface touches the paint.
If you drop the clay on the ground: Throw it away. Even if it looks clean, it can pick up grit that will scratch paint.
8. Wipe the area clean and re-check
Wipe off the lubricant with a clean microfiber towel. Then do the bag test again on that spot. If it still feels rough, lubricate and do a few more light passes.
9. Repeat around the whole car
Work top to bottom. Save the dirtiest areas for last. Change microfiber towels if they get damp or dirty.
If you have faded exterior trim, consider taping it off first. Clay and some lubricants can leave residue on textured plastic. If you are restoring trim, restore faded plastic parts after you finish the paint.
10. Optional: Clay the glass and wheels the right way
You can clay glass to remove overspray and road film. Use lots of lubricant and very light pressure. If your windshield has deep water spots, clay may not remove them fully.
Wheels are trickier. Brake dust can be sharp. If you clay wheels, use a separate piece of clay and do not use that clay on paint again.
11. Protect the paint right after claying
Claying removes bonded dirt, but it can also remove old wax. After claying, apply protection the same day.
- Spray wax or spray ceramic: Quick and beginner friendly.
- Paste wax: Takes longer but can look great.
- Sealant: A nice middle ground for durability.
This is also a good time to take care of other easy DIY jobs like DIY car AC filter cleaning while your car is already in the driveway.
Common Mistakes
- Claying a dirty car: Always wash first, and do not clay dusty paint.
- Not using enough lubricant: Dry claying is a fast way to scratch paint.
- Using too much pressure: The clay should do the work. Pressing harder does not help.
- Working on hot paint: Lubricant dries quickly and causes drag.
- Using one piece of clay for everything: Paint, wheels, and lower panels should not share the same clay surface.
- Dropping clay and reusing it: Toss it. It is not worth the risk.
- Skipping protection after: Bare paint will pick up contamination faster.
Maintenance Tips
You do not need to clay your car all the time. For most daily drivers, 1 to 2 times per year is plenty. Some cars can go longer if they are garaged and protected.
- Wash regularly using a gentle car shampoo.
- Use a spray wax or sealant every few washes to keep the surface slick.
- Remove fresh bugs and tar quickly. They bond more over time.
- Do the bag test every few months. Clay only if the paint feels rough.
If your car is having other issues and warning lights show up, do not ignore them. This guide on check engine light explained can help you understand what to do next.
Is It Worth It?
Yes, for most beginners it is worth it. A clay bar treatment gives you the “smooth paint” feel that many people think only comes from a professional detail. It also helps wax and sealant last longer because they bond to a clean surface.
It is especially worth doing if:
- Your paint feels rough after washing.
- You see tiny specks that will not wash off.
- You want your wax or sealant to look better.
- You are about to do a light polish.
For the average driveway DIYer, claying is a high-impact step that does not require expensive tools. If you enjoy at-home projects, topics like DIY home garage tools can help you build a simple kit over time.
Conclusion
A DIY clay bar treatment is simple when you follow the basics: Clean car, cool paint, lots of lubricant, and light pressure. Work in small sections and keep folding the clay to a clean surface. When you are done, protect the paint right away with wax or sealant.
Take your time on your first attempt. Once you feel how smooth the paint becomes, you will understand why claying is a great beginner detail step.


